BDP: Usage
bdp.sh) in a text editor and change the BrainSuiteMCR variable to point to the correct installation. Users may also need to download and install C/C++ runtime libraries which can be found here for Windows (64-bit), via Xcode for Mac and by installing libstdc++6 & its dependencies for your corresponding Linux distribution.Running BDP
The BDP is a command-line tool that takes diffusion images and a bias-field corrected MPRAGE image (fileprefix.bfc.nii.gz file generated by BrainSuite) as input, performs distortion correction and co-registration, and writes out the estimated diffusion tensors and ODFs and various other output files. BDP can read diffusion images in NIfTI-1 format. Please see supported file-formats for more details. It is recommended, but not required, to copy all of the required files to a separate directory for diffusion processing. The output files are written to the directory where the bias-field corrected MPRAGE image is located.
- Check this list of requirement details to verify that your diffusion data is appropriate for BDP processing.
- If you have not already done so, download and install MATLAB Compiler Runtime (MCR) release R2015b (9.0) for your operating system using links below.
(The BDP scripts assume that the MCR is installed in a default location; if this is not the case, open the script (
bdp.sh) in a text editor and change the BrainSuiteMCR variable to point to the correct installation.) - If you have not already done so, download and install C/C++ runtime libraries for your operating system:
- Windows: Visual C++ runtime package from Microsoft website (64-bit only).
- Mac: Install Xcode to get all runtime libraries.
- Linux: (Usually pre-installed) Install
libstdc++6& its dependencies for your distribution.
- Open Terminal (or Command Prompt)
In Windows, the Command Prompt is found by clicking the Start Menu, All Programs, and then the Accessories folder. The Terminal application in Mac OS X is found in the Utilities directory in the Applications menu. How to open a terminal in Linux is distribution-specific, so search online for your distribution and how to open a terminal (often it is located in an “Accessories” or “System Tools” folder in the application menu).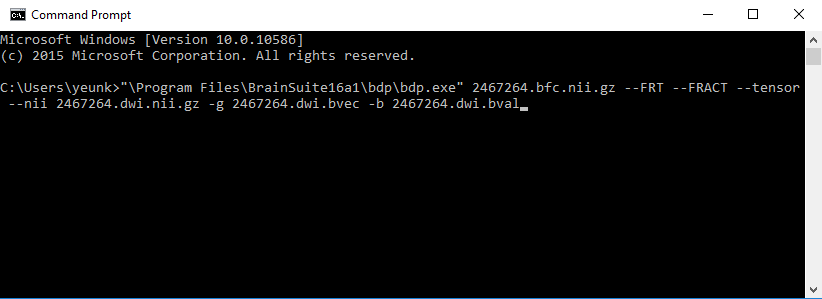
Windows Command Prompt showing a sample BDP command
- Run BDP
Depending on the format of your diffusion images and type of distortion correction required, the BDP script can be run in different ways as explained below. For details, please check exhaustive list of all the available flags and their descriptions on the BDP flags page.
Please replacebdp.exewith full path of BDP executable in examples below. E.g. On Windows, replacebdp.exewithC:\Users\name\BrainSuite16a1\bdp\bdp.exe.Using NIfTI input:
BDP can read 4D NIfTI files as diffusion data input, which can be specified with the--niiflag. In this mode, the following files are required:fileprefix.bfc.nii.gz– bias-field corrected MRI image, saved by BrainSuite extraction sequence with.bfc.nii.gzextension.- Diffusion images in 4D NIfTI format – saved as
.niior.nii.gzextension - Gradient file – usually saved as plain text files with
.bvecextension which contains diffusion gradient directions (example here). BDP assumes that the gradient directions are specified in voxel coordinates of the diffusion image. If not, the resulting tensors and ODFs produced may not be properly aligned to the anatomy of the subject. - b-values file – usually saved as plain text files with
.bvalextension which contains b-values of diffusion scan.
- Windows:
-
bdp.exe <BFC File> [Optional Flags] --nii <4D DWI NIfTI> -g <Gradient File> -b <B-Value File> - Linux and Macintosh:
-
bdp.sh <BFC File> [Optional Flags] --nii <4D DWI NIfTI> -g <Gradient File> -b <B-Value File>
Where
<BFC File>is the filename of the.bfc.nii.gzfile,<4D DWI NIfTI>is the filename of the diffusion weighted image in NIfTI format, <Gradient File> is the filename of the gradient (bvec) file, and <B-Value File> is the filename of the b-value file or the value in s/mm2 if you do not have this file.Example
Assume all required files are in the directoryC:\Users\name\subject\diffusion_processingas such:C:\Users\name\subject\diffusion_processing\subj1.bfc.nii.gz C:\Users\name\subject\diffusion_processing\subj1.dwi.nii.gz C:\Users\name\subject\diffusion_processing\subj1.bvec C:\Users\name\subject\diffusion_processing\subj1.bvalTo run BDP with default settings, run the script as (all on a single line):
bdp.exe C:\Users\name\subject\diffusion_processing\subj1.bfc.nii.gz
 --nii C:\Users\name\subject\diffusion_processing\subj1.dwi.nii.gz
 -g C:\Users\name\subject\diffusion_processing\subj1.bvec
 -b C:\Users\name\subject\diffusion_processing\subj1.bval
Or to estimate both ODF and tensor data, run:
bdp.exe C:\Users\name\subject\diffusion_processing\subj1.bfc.nii.gz --FRT --FRACT --tensor
 --nii C:\Users\name\subject\diffusion_processing\subj1.dwi.nii.gz
 -g C:\Users\name\subject\diffusion_processing\subj1.bvec
 -b C:\Users\name\subject\diffusion_processing\subj1.bval
Optional flags
A list of all the available flags and their detailed description are available on the BDP flags page.