Cortical Surface Extraction Tutorial
The first step in analyzing MR images of the brain is skull-stripping, or isolating the brain from the rest of the image. BrainSuite contains tools to automatically extract the brain and then generate 3D models of its cortical surface that can be used for further analysis. BrainSuite also allows you to manually edit the files it creates, as well as set the parameters for making those files if the defaults do not work as expected. This tutorial helps familiarize you with BrainSuite, its interface, and how to accomplish these important pre-analysis steps, which are documented in more detail here.
Download the file for this tutorial here and unzip it somewhere easy to access, such as your desktop. It contains the folder BrainSuiteTutorialCSE with the scan 2523412.nii.gz.
The file 2523412.nii.gz is part of the Beijing Enhanced dataset, released by Beijing Normal University as part of the International Neuroimaging Datasharing Initiative (INDI) under a Creative Commons Attribution-NonCommerical 3.0 Unported License (CC-BY-NC). More information on the complete dataset is available online here, and it can be downloaded from NITRC.
Get Started
- Open BrainSuite
- Open
2523412.nii.gzvia File > Open Volume - Spend some time familiarizing yourself with the views and how the four windows are related
- Double-click at various points in the surface viewer
- Hold down Ctrl (Cmd on Mac) and move the mouse up and down
- Click and drag around the surface viewer and the three orthogonal views
- Open up the image display properties from View > Image Display Properties and play with the slider under “Volume”
- Right click on one of the views and select an option from “Image LUT” to try different colormaps
- When you’re done, you can reset the orthogonal views to default by reloading the
2523412.nii.gzfile.
Run Full Cortical Surface Extraction Sequence
- Open the CSE dialog via Cortex > Cortical Surface Extraction Sequence

- Check that the filename prefix is
2523412and the working directory is theBrainSuiteTutorialCSEdirectory - Click “Step >” on the “Cortical Surface Extraction Sequence” dialog
- Click “Step >” three more times, until the Skull Stripping Tool dialog says “finished skullstripping”

- The default parameters work for most scans. However, they don’t work well for this one. We can improve it by changing some of the parameters. Open the Skull Stripping Tool’s dialog by going to Cortex > Skull Stripping (BSE).
- Click back three times
- Change the edge constant to 0.5
- Click “Step >” until the dialog once again says “finished skullstripping”. Notice how the mask looks different each step from how it looked with the default value.
- Oops—now it doesn’t skull-strip the brain at all (it simply outlines the image). Click “< Back” until it again says “edge detection”.
- Change the Edge Constant to 0.75.
- Again click “Step >” until skull-stripping is completed. Note how the mask looks at each step this time.
- Now we’re again leaving out too much of the brain. Step all the way back to “anisotropic diffusion filter,” the first step of skull-stripping with the progress bar at 0%.
- Set the Diffusion Constant to 30 (increasing the amount of smoothing) and set the Edge Constant to 0.8. Step through to the end of skull-stripping (“finished skullstripping”).

- This mask contains the whole brain with only a bit of non-brain tissue, so it should work well for the rest of the process. You can manually fix the mask with the mask tool if you wish.
- Close the Skull Stripping dialog box and return to the Cortical Surface Extraction Sequence dialog
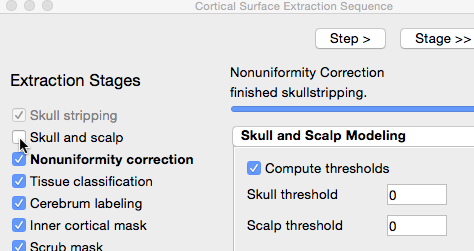
- The next stage, “Skull and Scalp”, produces surfaces for the skull and scalp, which are useful when you are working with EEGs and MEGs. This scan has been defaced for privacy protection, and so running this stage will not be helpful. Uncheck the box next to it.
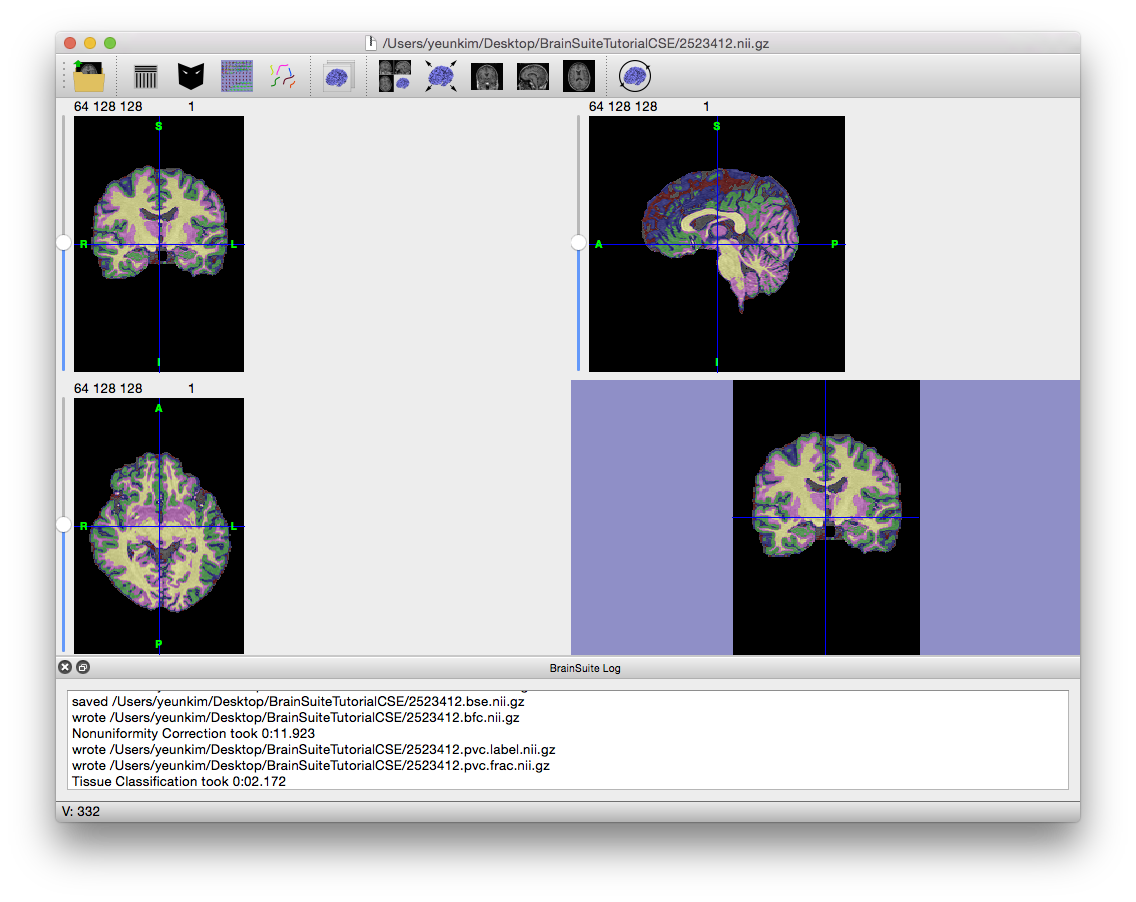
- Click “Stage >>” three times to finish skull-stripping (i.e. save the mask and masked volume) and perform bias-field nonuniformity correction and tissue classification.
- Now at the Cerebrum Labeling stage, the cerebellum will be removed from the brain mask and the cerebrum lobes will be labeled left and right. Click “Step >” twice to linearly align the BrainSuite atlas to the subject scan. If the alignment does not occur properly, try changing the cost function to “least squares” or “standard deviation” and run the Cerebrum Labeling stage again.
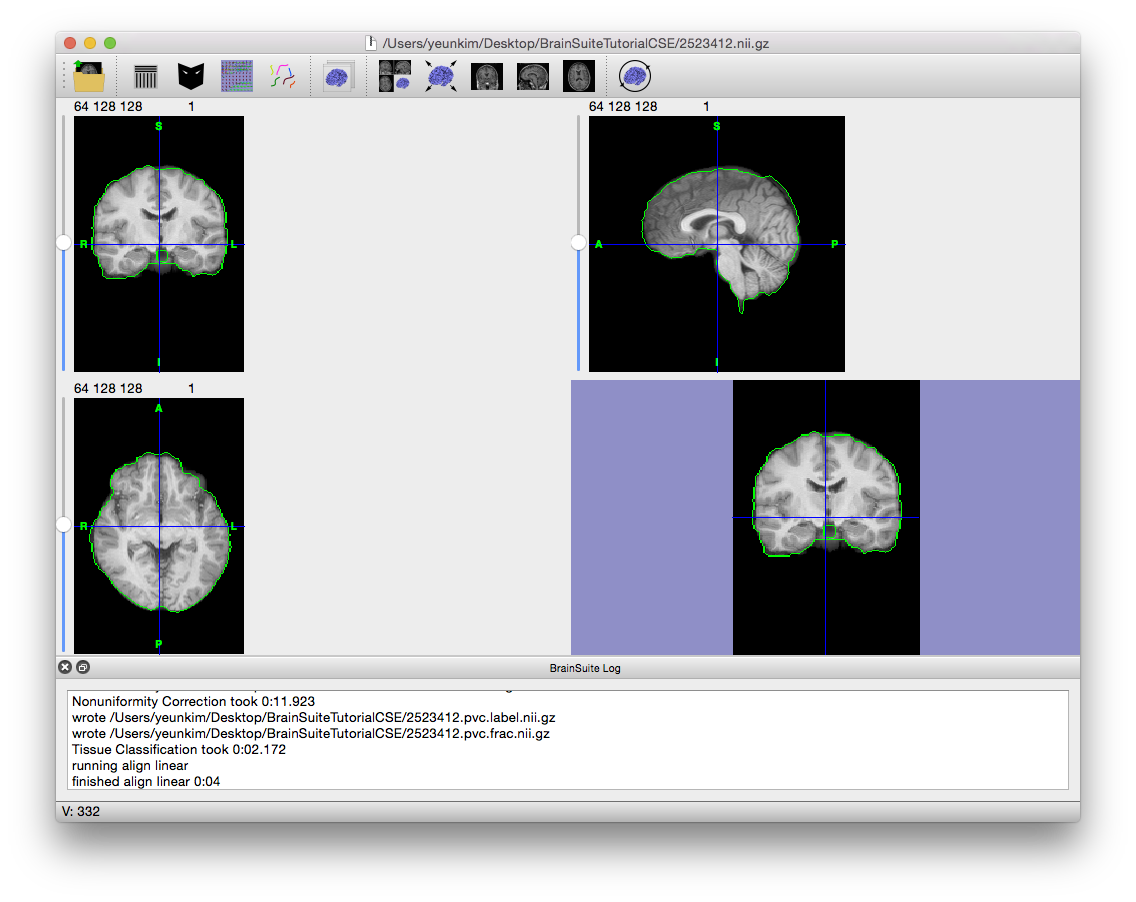
- Now at the Cerebrum Labeling stage, the cerebellum will be removed from the brain mask and the cerebrum lobes will be labeled left and right. Click “Step >” twice to linearly align the BrainSuite atlas to the subject scan. If the alignment does not occur properly, try changing the cost function to “least squares” or “standard deviation” and run the Cerebrum Labeling stage again.
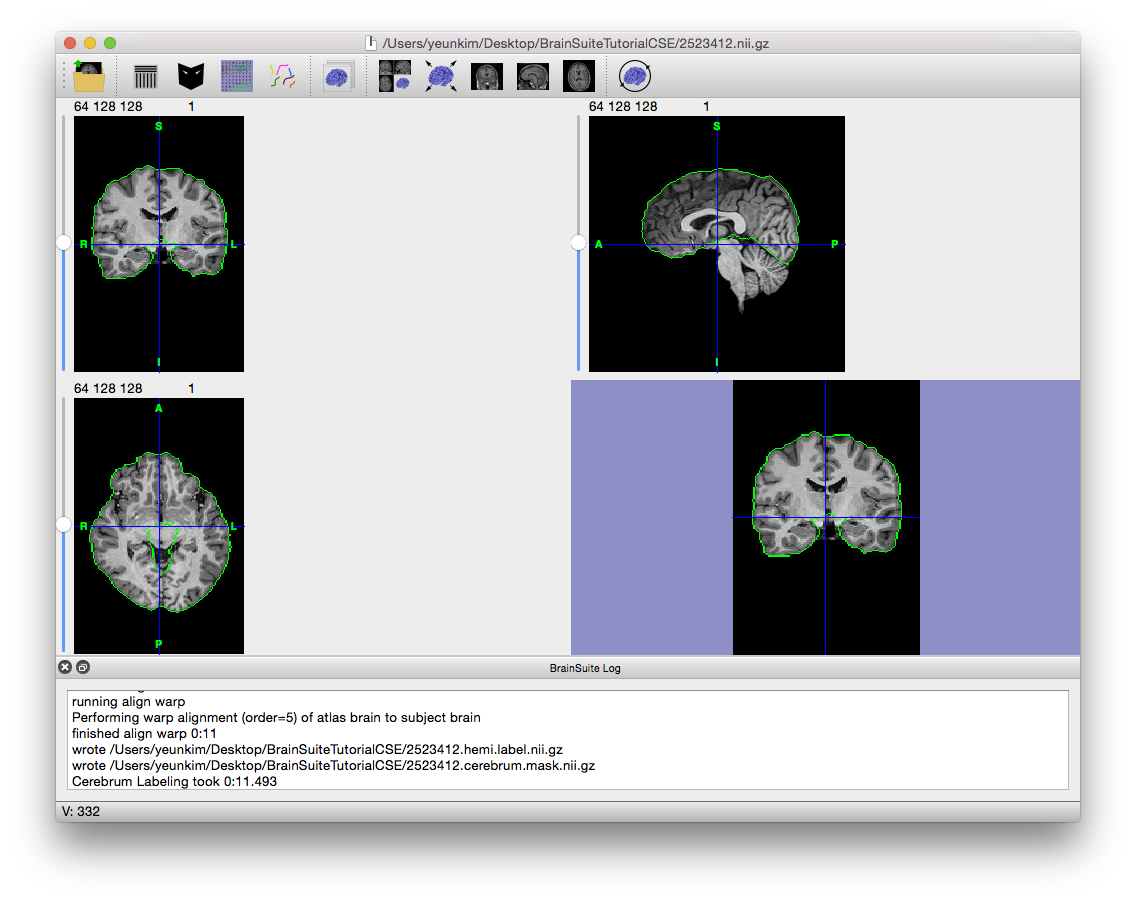
- Click “Stage >>” to finish the cerebrum labeling. Notice that the mask now excludes the cerebellum and brainstem, and much of the non-brain tissue.
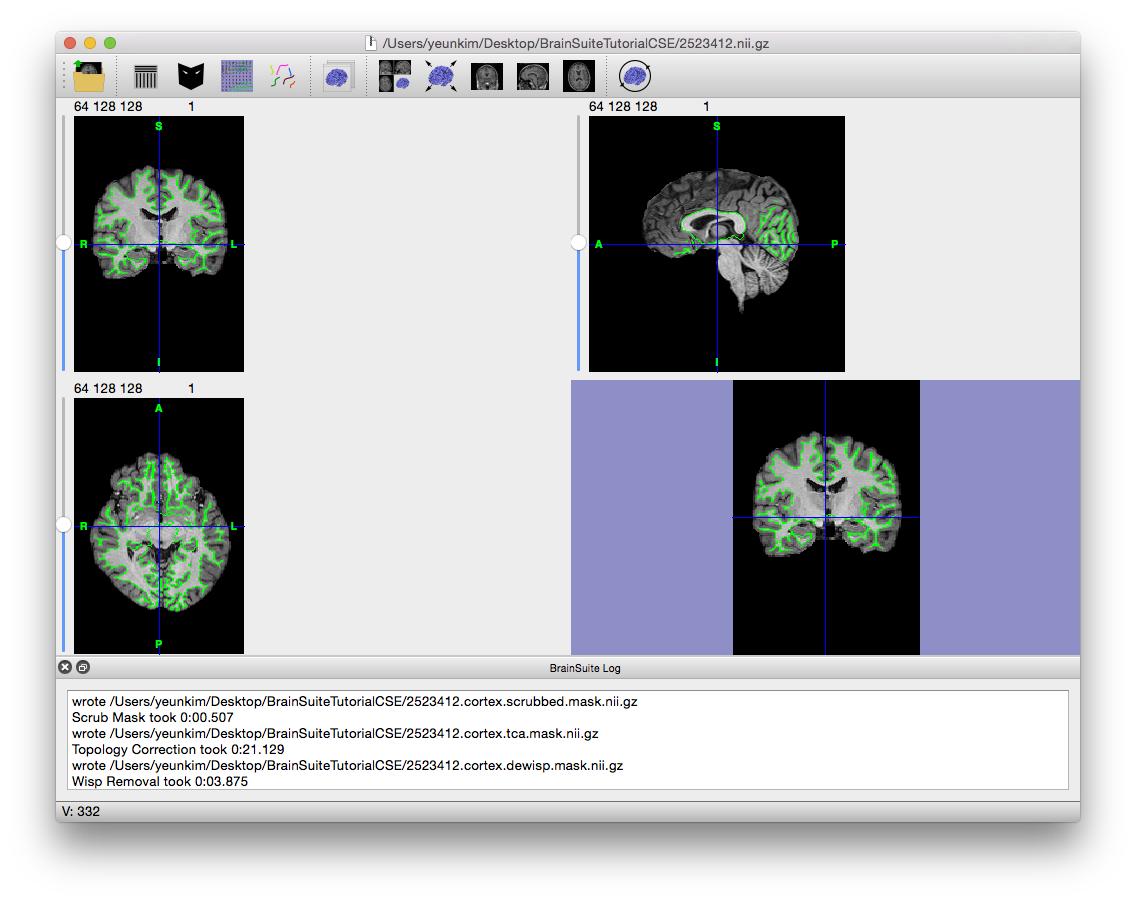
- Click “Stage >>” four times to run Inner Cortical Mask, Scrub Mask, Topology Correction, and Wisp Removal. These tools produce and clean up the white matter mask that will act as a foundation for producing the 3D inner cortical surface that is in turn used as the foundation for generating the pial surface.
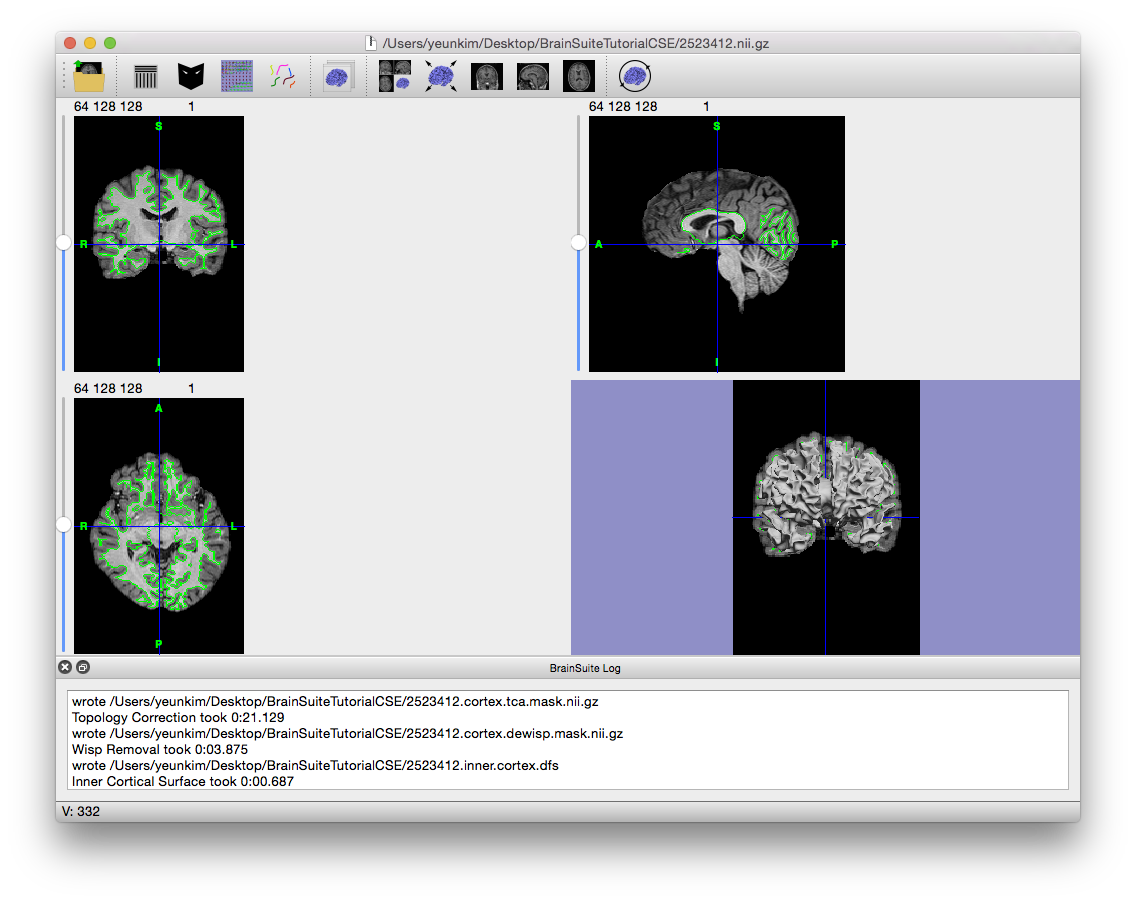
- Click “Stage >>” to produce the inner cortical surface, which will appear in the bottom right surface viewer.
- The next stage generates the pial surface. By default, it uses the cerebrum mask generated in the Cerebrum Labeling stage to constrain its expansion. If you wish to use a cerebrum mask of your own making, use the mask tool to create a custom mask, save it and then click the “Load Custom Mask” button on this stage to load and use the edited mask instead.
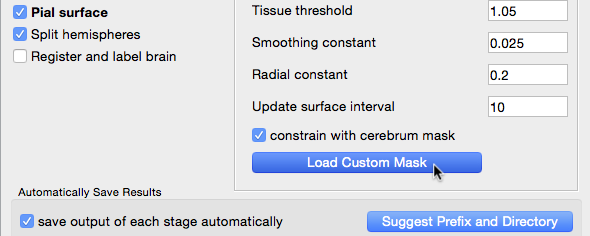
The default mask works well with this scan, so click “Stage >>”. Because pial expansion takes some time, it opens a dialog box to display how many iterations it has completed and an estimate as to how much time remains. The surface view will also update throughout this process.
- The final stage after pial surface generation is splitting and labeling the hemispheres. Click “Stage >>” to complete it.
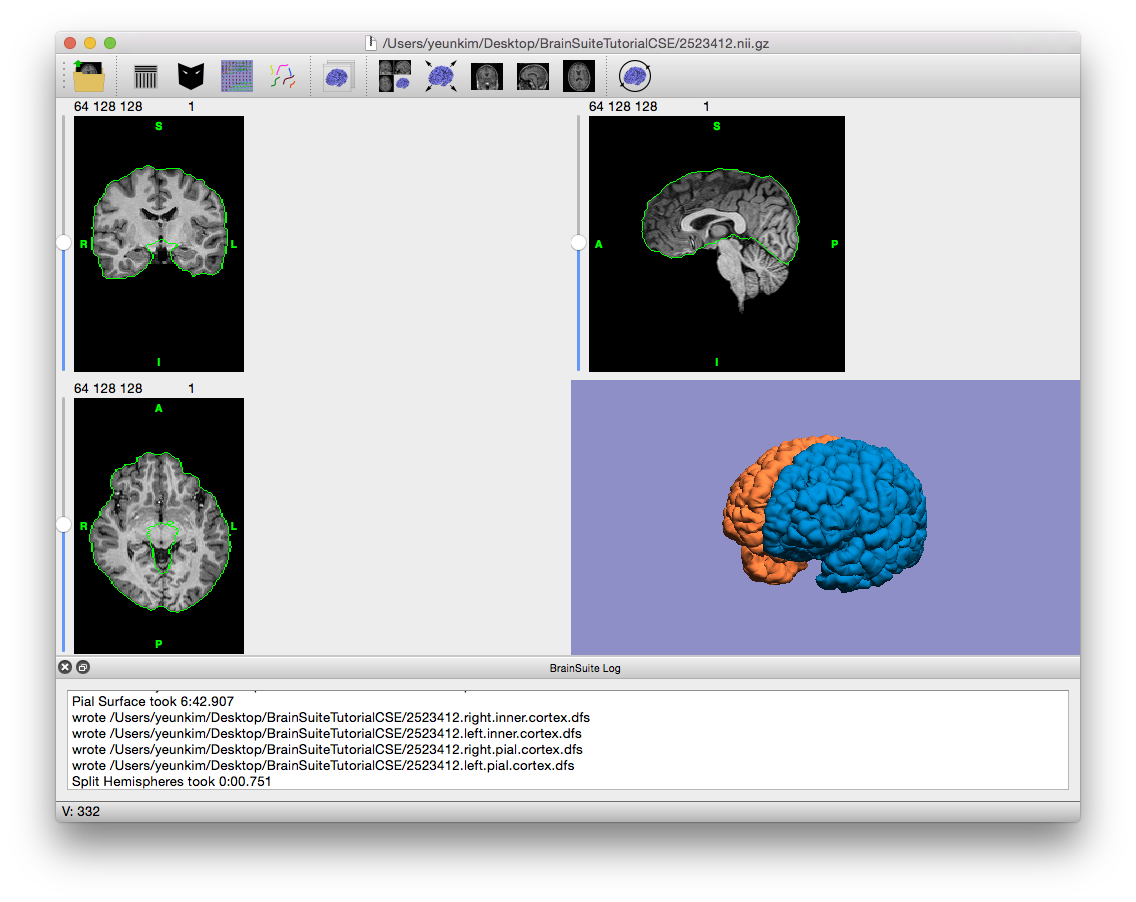
Final output of CSE, with cross-hairs off and volume slices hidden in surface view
- Observe the results. When the CSE Sequence is completed, the surface viewer will display a 3D model of the pial surface of the skull-stripped scan. If you open the BrainSuiteTutorialCSE folder, you’ll notice that it now contains many files, as described on the Cortical Surface Extraction Output Files page. You can open these files in BrainSuite to get an idea of their contents. Try running some of your own scans through the CSE sequence (you can click “Run All” instead of stepping through each stage as in this tutorial, especially once the first skull-stripping stage looks right), or continue on with this scan to the Surface/Volume Registration guided exercises to automatically segment and label the brain.