SVReg: Usage
SVReg is automatically installed as part of the BrainSuite download package. It can be run both through the BrainSuite GUI and as a command-line interface, as detailed below.
Before you begin
System Requirements
Required files
- fileprefix.bfc.nii.gz
- fileprefix.cerebrum.mask.nii.gz
- fileprefix.cortex.dewisp.mask.nii.gz
- fileprefix.inner.cortex.dfs
- fileprefix.left.inner.cortex.dfs
- fileprefix.left.pial.cortex.dfs
- fileprefix.mask.nii.gz
- fileprefix.pial.cortex.dfs
- fileprefix.pvc.frac.nii.gz
- fileprefix.right.inner.cortex.dfs
- fileprefix.right.pial.cortex.dfs
- fileprefix.warp
If you do not already have these files, they can be generated by running the BrainSuite scripts or by using the graphical interface and running the complete Cortical Surface Extraction Sequence with the “save output of each stage automatically” box checked.
Running SVReg from the BrainSuite GUI
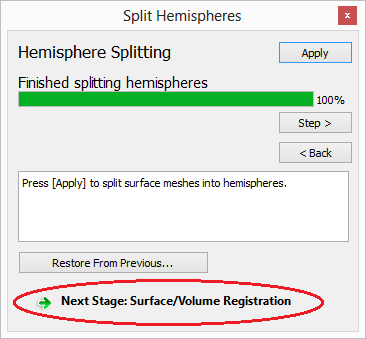
Running as a continuation of the CSE

Running on its own
- Make sure your original MRI file <e.g. “subj1.nii.gz”> and related required files (see above) are placed in the same directory. It is recommended that you place these files in a separate directory as SVReg generates a lot of files.
- Open your original MRI file from this directory.
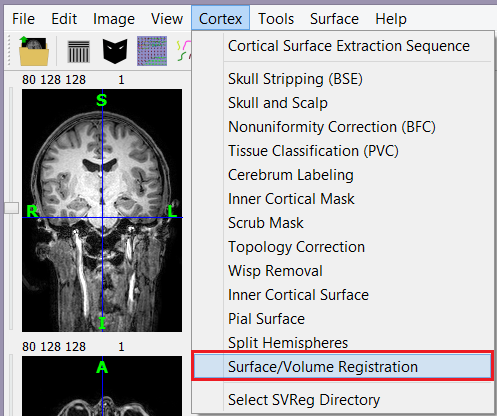
- Open the Surface/Volume Registration dialog box by clicking Cortex→Surface/Volume Registration
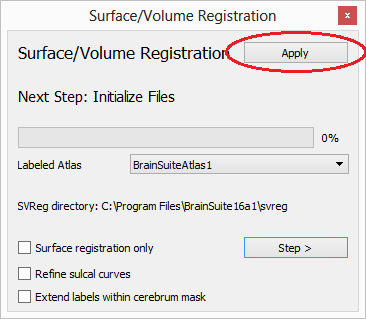
- (Optional) Select the Labeled Atlas using the drop-down menu. Select the appropriate options.
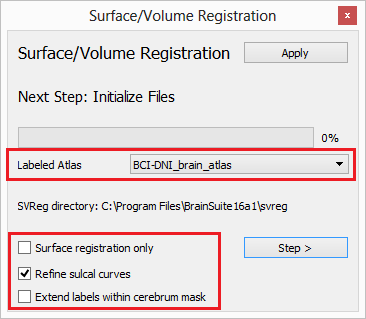
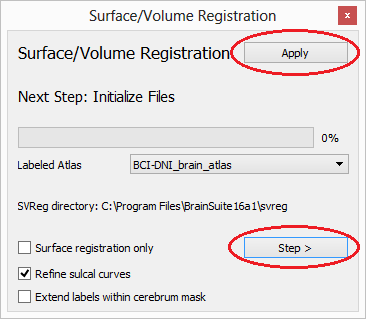
- Click “Apply” to run through all stages of registration and labeling automatically, or “Step >” to step through them individually.
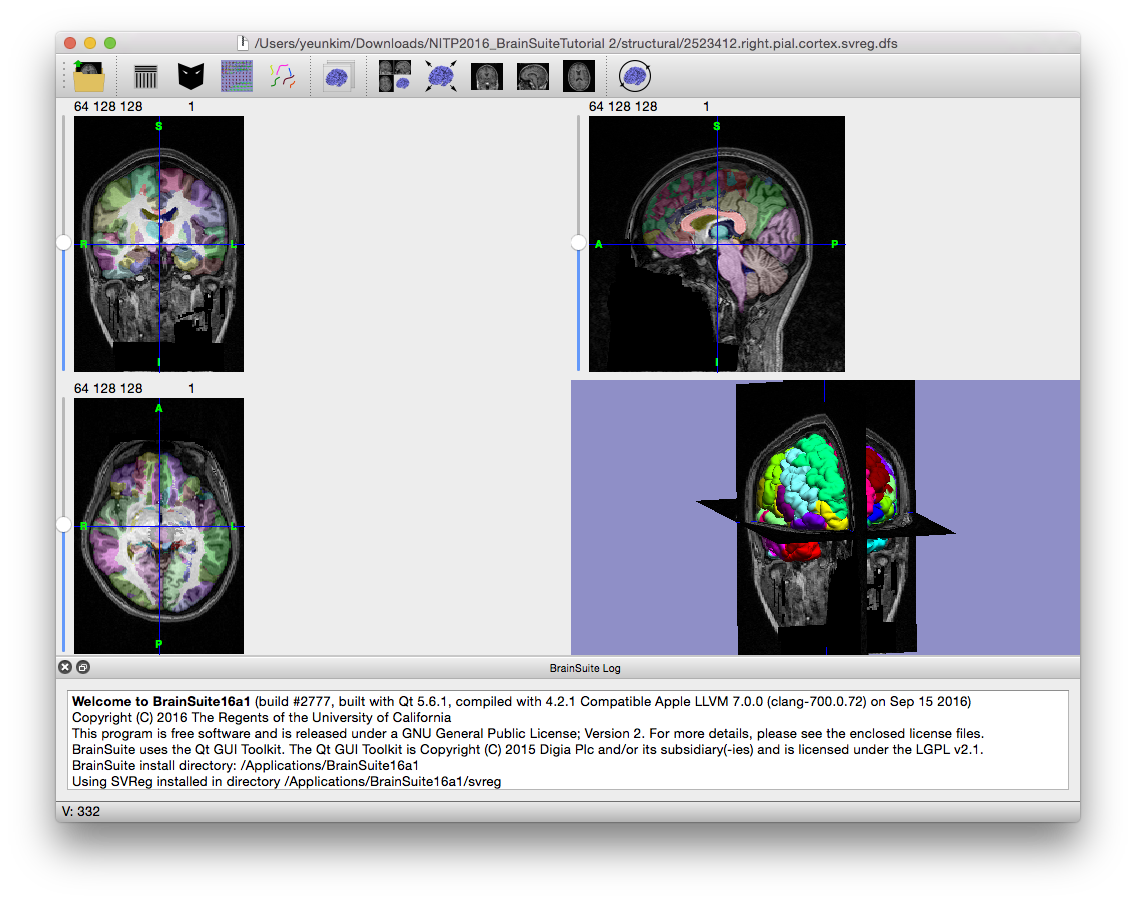
- Inspect the labeled surfaces and volumes in BrainSuite.
- SVReg will spawn windows detailing its progress and letting you know if something is wrong. Surface and volume registration is a computation-intensive procedure and you may notice some slowdown in other applications while this process is underway.
Running SVReg from the command line or terminal:
Setting up & general Usage
- Make sure your original MRI file <e.g. “subj1.nii.gz”> and related required files (see above) are placed in the same directory. It is recommended that you place these files in a separate directory as SVReg generates a lot of files.
- Add the SVReg directory to your system’s path, or navigate to where its binaries and scripts are located.
- Run the SVReg script corresponding to your system. This will execute the surface and volume registration modules and generate the labeled surfaces and volumes within your working directory. Note that *_file_prefix is the path of the subject or atlas file followed by its filename without the file extension. Atlas folders can be found in the SVReg directory.
Windows
svreg.exe <subject_file_prefix> [<atlas_file_prefix>] [-<flags>]Example: svreg.exe "C:\Users\username\testsubject\testsubject" -t
Note that atlas_file_prefix and flags are optional, as indicated by the square brackets; SVReg uses the included atlas and runs in verbose mode, cleaning up intermediate files, and without refinement by default.
Linux and Mac
svreg.sh <subject_file_prefix> [<atlas_file_prefix>] [-<flags>]Example: svreg.sh ~/testsubject/testsubject /BrainSuite16a1/svreg/BrainSuiteAtlas1/mri -t
Note that atlas_file_prefix and flags are optional, as indicated by the square brackets; SVReg uses the included atlas and runs in verbose mode, cleaning up intermediate files, and without refinement by default.
Flags (optional)
| Flags | |
|---|---|
| -H ### | Assigns a number of iterations in the intensity registration step. By default, we perform 100 iterations, but you can specify a different number using this flag. If no number is specified and only H flag is used, then 600 iterations are performed. Example: -H 600 |
| -s | If surface registration and labeling was already performed at an earlier time and the user would not like to redo this step, then this flag may be used to skip ahead to the volumetric registration. Necessary input files will need to be present in the input directory called by the command. |
| -S | Perform surface registration and labeling only; skip the volume registration and labeling. |
| -p | If the p-harmonic volumetric registration was already performed at an earlier time and the user would not like to redo this step, then this flag may be used to skip ahead to the intensity registration and label transfer step. |
| -cbm | Can call a manually edited cerebrum mask to limit boundaries. Will use file: subbasename.cerebrum.mask.nii.gz Make sure to correctly replace your manually edited mask file in your input folder with the correct subbasename. |
| -cur sulname.dfc #sul1 #sul2… | This flag is used in svreg_label_surf_hemi script to give user control over the curve matching process between the atlas and subject. One can specify the name of the .dfc file <sulname.dfc> and the sulcal numbers <#sul> to be used as constraints. Users can manually edit curves by using the BrainSuite gui interface. Ex: -cur subbasename.right.dfc 1 2 20 |
| -C | The cerebrum mask <subbasename.cerebrum.mask.nii.gz> will be used for masking the final labels instead of the default pial surface mask. Every voxel will be labeled within the cerebrum mask regardless of the boundaries of the pial surface. |
| -D # | Cortical volume labels found in file output subbasename.svreg.label.nii.gz find its boundaries by using the pial surface then dilating by 1 voxel. Use this flag in order to control the number of pial surface mask dilation. (ie. –D 0 will assign no voxel dilation) |
| -v0 | verbosity level 0: no messages will be reported |
| -v1 | verbosity level 1: messages will be reported but not the iteration-wise detailed messages |
| -v2 | verbosity level 2: all the messages, including per-iteration, will be displayed |
| -gui | Short messages instead of detailed messages |
| -m | Module name will be displayed in the messages |
| -t | Timestamps will be displayed in the messages |
| -U | Single threaded mode |
Checking Outputs
Checking outputs
SVReg versions 15a and above contains a new labeled atlas named BCI-DNI_atlas. The description of this new atlas can be found here.
Example Result