Cerebrum Labeling
 Once the brain volume has been extracted and classified, it is separated into cerebellum, cerebrum, and other structures to enable identification of the cerebral cortex. To achieve this, a volumetric registration is applied to the image(AIR, Woods et al., 1998), aligning a labeled atlas to the brain volume using the Cerebrum labeling step.
If the brain volume and atlas are in different orientations:
If the subject volume and the atlas are not in the same rotation, either the subject or atlas volume can be rotated. To rotate the subject volume, do so before beginning the Cortical Surface Extraction process as many of the intermediate files used during the CSE procedure also need to be rotated.
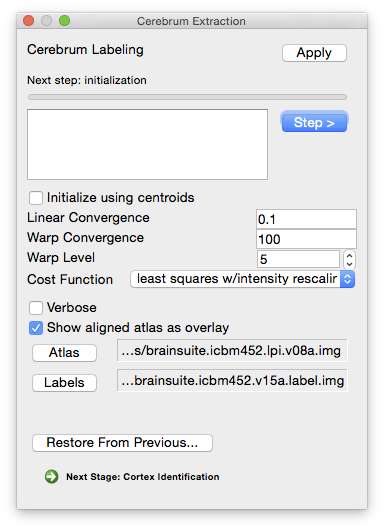
To rotate the atlas, the Cerebrum labeling tool will need to be configured to use the new atlases. The dialog shows where these files are stored. Use a tool such as reorient (part of the AIR package of tools) to reorient the atlas and label files and save them under new filenames. Then choose the label and atlas volume in the configuration options.
Steps
Initialization
- Parameters
Initialize using centroids Verbose Display more verbose status updates (default is to show how much time each stage took).
- Show aligned atlas as overlay Display the atlas used for this stage as an overlay. The atlas and scan won’t be registered yet, but they should both have the same orientation.
Linear alignment
 BrainSuite will invoke AIR’s alignlinear function to register the atlas to the brain (see AIR’s reference pages for details on AIR).
- Parameters
Linear Convergence Sets the threshold for the change in the cost function used to determine if it converged (i.e. if the scan is aligned to the atlas). If the scan doesn’t seem to be registering to the atlas upon completion, try setting this value lower. Conversely, if the registration doesn’t complete at all, increase this value. The default value should work for the vast majority of cases.
- Cost Function Possible choices are: standard deviation, least squares, and least squares with intensity rescaling. For the advantage and disadvantages of each, refer to the alignlinear documentation.
Warp alignment
 This step registers the atlas to the brain using a nonlinear deformation.
- Parameters
- Warp Convergence The threshold of the change in the cost function before the scan is considered aligned with the atlas. If the scan is not registering correctly, decrease this value; if registration is not completing, increase this value.
- Warp Level (ranges from 2 to 8) The degree of the polynomial model used for the transformation. Higher order models allow for more flexibility in registering the atlas to the brain at the expense of requiring more time and computational power.
Label lobes
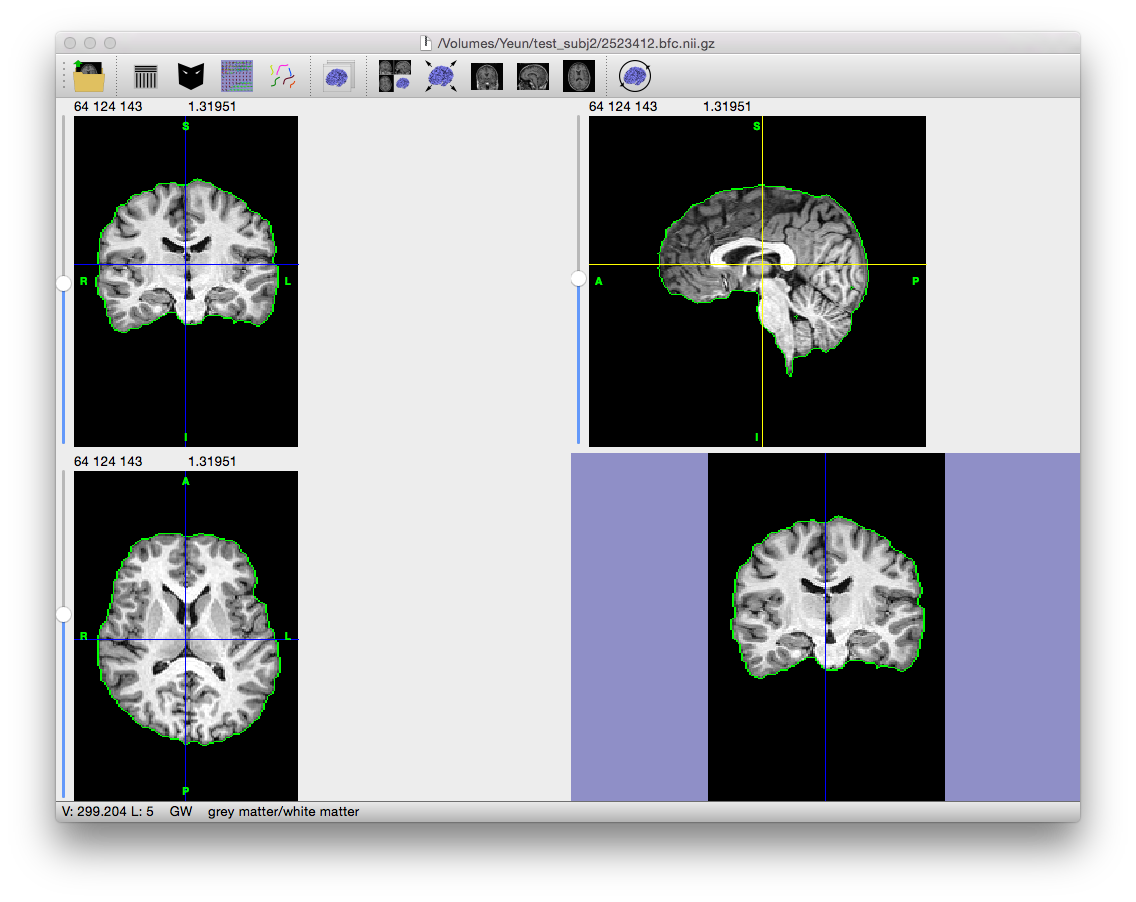
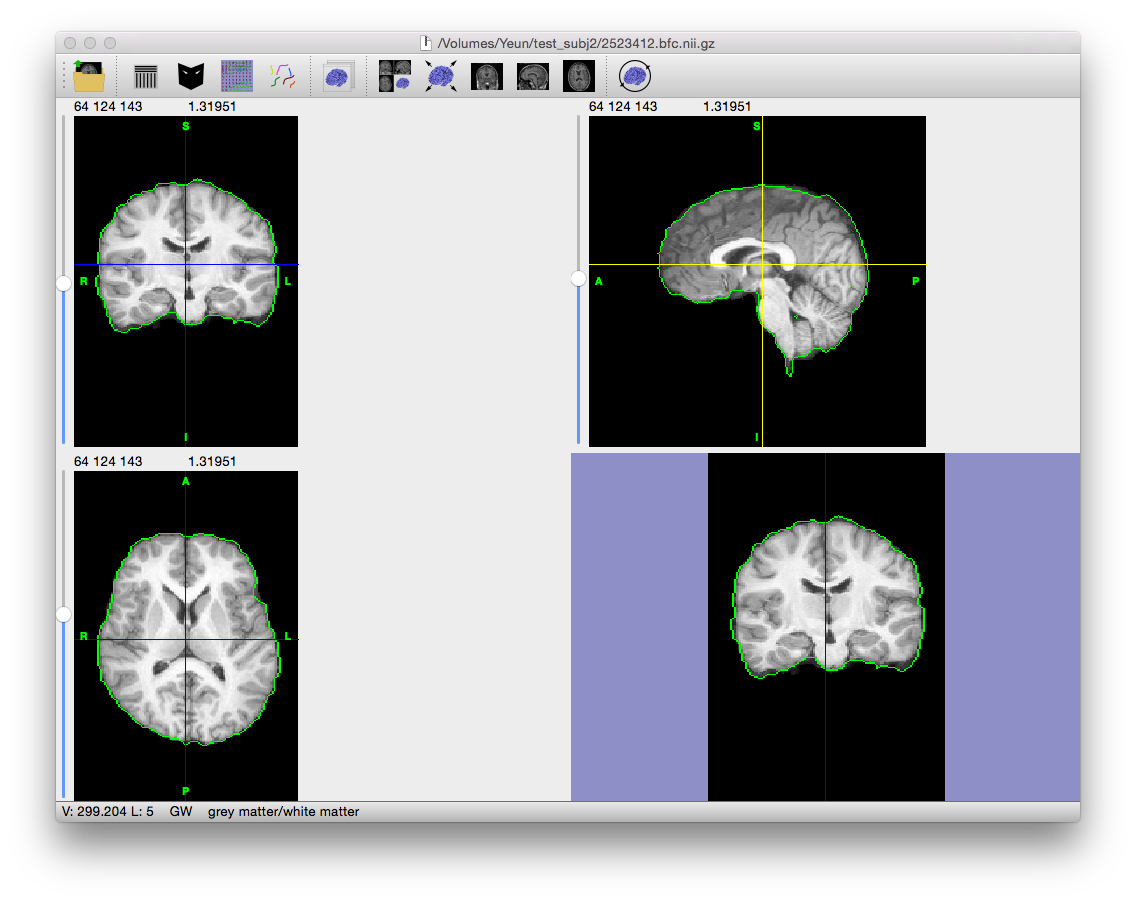
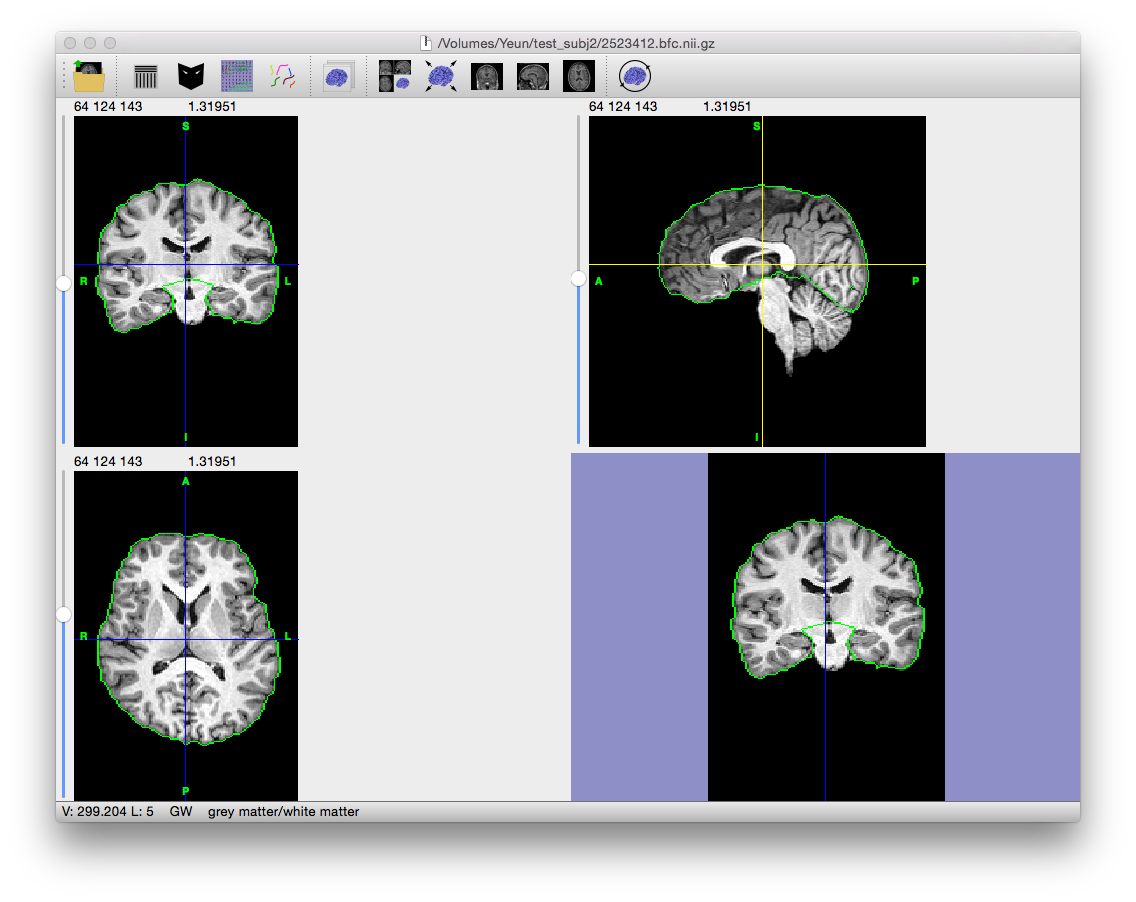 This step transfers the registered lobe labels to the subject brain volume. BrainSuite will display the volume with the cerebrum masked.
Command-Line Usage
cerebro: performs automated labeling of cerebellum and cerebrum in T1 MRI. Input MRI should be skull-stripped or a brain-only mask should be provided.
usage: cerebro -i input –atlas atlas –atlaslabels label [optional settings]
example: cerebro -i input_mri.nii.gz –atlas brain_atlas.img –atlaslabels brain_atlas.label.img
Required Settings:
| Flags | Description |
|---|---|
-i <input MRI> |
input 3D MRI volume |
--atlas <atlas MRI file> |
atlas MRI volume (ANALYZE format) |
--atlaslabels <label file> |
atlas labeling volume (ANALYZE format) |
Optional Settings:
| Flags | Description |
|---|---|
-m <mask file> |
brain mask file* |
-o <output mask> |
output cerebrum mask volume* |
-l <label file> |
output labeled hemisphere/cerebrum volume |
-c <cost function> |
0,1,2 [default: 1] |
--centroids |
use centroids of data to initialize position |
--air <output air file> |
save affine transform to file |
--warp <output warp file> |
save warp transform to file |
-v <level> |
verbosity level (0=silent) [default: 1] |
--linconv <value> |
linear convergence [default: 0.1] |
--warplevel <order> |
warp order (2,3,4,5,6,7,8) [default: 5] |
--warpconv <warpconv> |
warp convergence [default: 100] |
--keep |
don't remove temporary files |
--tempdir <directory> |
specify directory to use for temporary files |
--tempdirbase <directory> |
create a temporary directory within this directory |
Notes:
The input MRI should be skull-stripped or a brain mask file should be used.
The atlas is also expected to be skull-stripped.
(*) either an output mask file or an output label file is required.
Cerebro makes use of the AIR5.2.5 library, developed by Roger P Woods, MD
Example Result
Output Files
If “save output of each stage automatically” is checked on the Cortical Surface extraction dialog, the following files are generated (where filename_prefix is the filename of the MRI scan without the file extension, e.g. “testsubj” for the file “testsubj.nii”):
| Filename | Contents |
|---|---|
| filename_prefix.air | File generated by AIR describing the transformations required for linear registration. More information available in AIR’s reference. |
| filename_prefix.warp | File generated by AIR describing the transformations required for nonlinear (warp) registration. More information available in AIR’s reference. |
| filename_prefix.hemi.label.nii.gz | Label volume with left and right cerebrum, cerebellum, and ventricles/diencephalon. |
| filename_prefix.cerebrum.mask.nii.gz | Mask of the cerebrum for original scan |
Restore from Previous Session
If BrainSuite was interrupted while performing this stage or to change the parameters for this stage and rerun after fully processing a scan, click “Restore From Previous…” on the bottom of this stage’s dialog box and load the original MRI scan. BrainSuite will automatically load all of the files generated in previous stages, allowing processing to restart from this intermediate stage.